
Note: If required, a digital image of the business logo may be loaded into the software to attach it to invoices. This logo can then be positioned anywhere on the invoice. This will attach to all invoices until removed by the user.
Sales> Invoice Production> Invoice/ Credit Note Printing
To Attach / Load A Logo Click On The "Logo / Bank" Option
- Click on the Logo/Bank image to load a logo.
- Simply click on Load Image, and a browser option will appear simply direct to the saved location of the image and load.
- The program will always look to this location to load the image to all invoice’s hereafter for printing until the user returns to this menu and selects Remove Image.
- If the program cannot locate an image which has been attached, it is for one of three reasons:
- The file containing the image has been deleted
- There are multiple files of the same name (although different types) located in the directory from where the image is attempting to load
- The user no longer has access to the drive on which the image file resides.
Note: The load image option can also be used to load a custom-made narrative for printing on all Invoices, e.g. Payment/Credit Terms, change of address etc.
- To load a narrative such as bank details or payment terms to appear on the page. Select Logo / Bank and then Load Image to load the image, using the Image Settings position the image on the invoice. The logo can be positioned to appear anywhere on the invoice.
- Example: To load Payment terms and bank details to appear as a footer to an invoice you must first create a template within a Word Document (or similar) by typing and formatting the information exactly as you would like to see it appear on the invoice.
- When complete, click the Print Screen button on your keyboard.
- Open Paint from the Program listing on the Windows Start button to the bottom left corner of the screen.
- Within Paint click Edit and Paste. The Word Document screen will appear within the Paint screen.
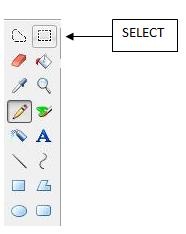
- Click the Select symbol from the tools on the left-hand side of the screen.
- Using the select option cut out the text that you wish to save. Right-click and select Copy to (as shown)
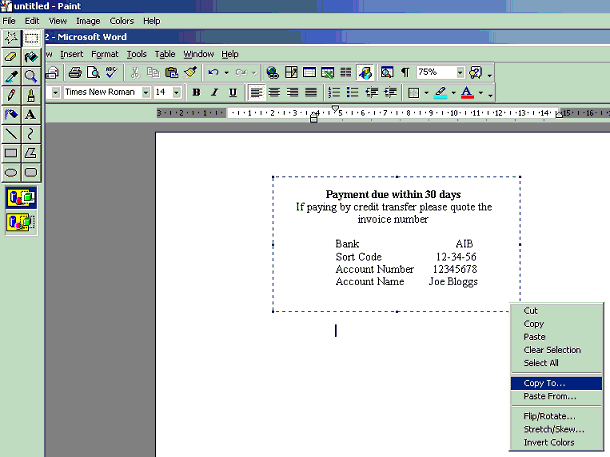
- Right-click and select Copy to (as shown), saving as a Bitmap file (*.bmp).
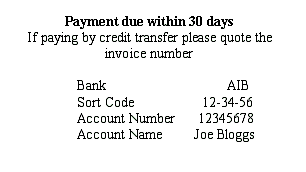
- Within Thesaurus Accounts, return to the Print Invoice screen.
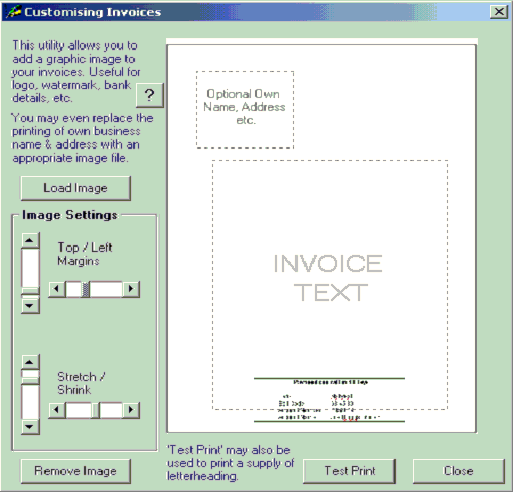
- Click on the logo/bank image to preview the invoice layout. Within this screen select load image & load the Bitmap file to the invoice.
- Use the Image Settings to position the image and increase/decrease the size of the header/footer.
- Print Test Prints to review the imported header/ footer.
- Close
Comments
0 comments
Please sign in to leave a comment.